Last updated: September 2026
It is 11 p.m. on a Tuesday in Singapore, and Priya has just learned the first rule of podcast audio production: great conversations make terrible recordings. Her first episode — phone propped on books, fan humming, spare bedroom echoing — was a joy to record and a mess to hear.
A decade ago, salvaging it meant a treated studio and an editor billing by the hour. In 2026 it means an evening with AI tools that cost less than a streaming subscription.
The gap between amateur and professional audio is now mostly software. Speech enhancement removes room echo and fan noise. Text-based editors cut every stumble by deleting a sentence. Automated mastering targets the exact loudness levels platforms expect. The microphone still matters — less than you fear, more than marketers admit.
This guide walks the full pipeline with no studio and no engineer: diagnose what actually sounds wrong, choose gear at four budgets, treat your room for free, pick cleanup tools from an honest comparison, and export to spec the first time.
Short answer: AI podcast editing means recording on modest gear, then using speech enhancement, transcript-based cuts, filler-word removal, and automated mastering to reach studio-grade sound. The workflow — record, clean, edit, master, export at -16 LUFS, publish — typically costs $0 to $60 a month in tools.
What AI podcast editing covers in 2026
The term "AI podcast editing" bundles four different technologies, and knowing which one solves which problem is half the battle:
- Speech enhancement strips noise and room reverb from a recording while keeping the voice natural — one-click tools in, studio-adjacent audio out.
- Text-based editing transcribes the episode, then cuts audio when you delete words, so editing feels like fixing a document.
- Filler and artifact removal finds the ums, uhs, mouth clicks, and long silences, and deletes them in one pass.
- Automated mastering applies leveling, loudness normalization, and peak control to hit delivery standards like -16 LUFS.
The economics explain the adoption. Riverside's production guide (updated July 2026) puts freelance podcast editing at $30 to $50 per finished audio hour, rising to $200 for specialist work — a biweekly 40-minute show bills hundreds of dollars monthly. A tool stack doing 80 percent of that work costs a fraction.
The audience justifies the polish. The Infinite Dial 2026 counts 81 percent of Americans aged 12 and over — 233 million people — listening to online audio monthly, and Riverside reports 80.5 percent of podcasters now record with video, which raises the bar for how every episode sounds and looks. Listeners do not demand perfection; they do punish recordings that feel careless.
Diagnose before you fix: the six problems behind amateur audio
Most "bad audio" complaints are actually six separable problems. Name yours before buying anything:

- Room reverb. Sound bounces off bare walls and tile, arriving at the mic milliseconds late. The tell: clap in the room; if you hear a tail, you have reverb. Fix with absorption at the mic, or AI de-reverb if the recording already exists.
- Noise floor. Fans, air conditioning, refrigerators, traffic — a constant layer under the voice. Steady noise is the easiest AI fix; sudden noise is not. Prevention: record with the A/C off and the phone in airplane mode.
- Level mismatch. Two speakers at different volumes, or one host drifting toward and away from the mic. Fix with close-mic technique — a hand's width — and leveling in the master pass.
- Filler words. The ums and you-knows that bore listeners and pad runtime. Fix in a text-based editor or a dedicated filler remover, using a custom list:
um, uh, you know, I mean, like, basically, sort of, kind of, right,
okay so, literally, actually, just, well
- Mouth sounds and breaths. Clicks, lip smacks, and audible inhales that normalize into distraction. Dedicated cleanup tools catch these; manual editing rarely bothers.
- No loudness standard. The episode is quieter or louder than every other show in the queue, so listeners ride the volume knob. Fix once, at export, with a LUFS target.
Gear solves problems 2 and 3 best; software solves 1, 4, 5, and 6 after the fact. Diagnosing first is why this workflow starts with a listening pass, not a shopping trip.
The gear question settled: five budgets
Descript's 2026 starter-kit guide (updated July 2026) and Buzzsprout's gear recommendations converge on the same shape — you buy confidence in steps, not perfection at once:
| Budget | Core gear | What you get |
|---|---|---|
| $0 | Phone, wired earbuds, quiet soft room | A validating format; AI cleanup carries the sound |
| $150 | USB condenser or dynamic mic plus monitoring headphones | The classic first kit; immediate, audible upgrade |
| ~$400–$500 | Dynamic mic plus small interface or mixer | Growing weekly show, multi-input ready |
| ~$775–$960 | Broadcast-style dynamic mic, multi-input interface, closed headphones | Serious weekly show with guests |
| $2,500 | Premium mic chain, pro caster station, dedicated recorder | Studio-grade multi-person productions |
Two buying rules beat any table. Dynamic microphones reject room noise better than condensers, which makes them the default for untreated homes. And whatever you buy, the room and the microphone distance matter more than the price tier — a $150 mic a hand's width from your mouth in a soft room beats a $2,500 chain in a glass office.
If you are still pre-launch, the full equipment-to-distribution walkthrough in our guide to starting a podcast with AI situates this table in the bigger plan.
Room treatment that costs nothing
Acoustic treatment is absorption, and soft household objects absorb:
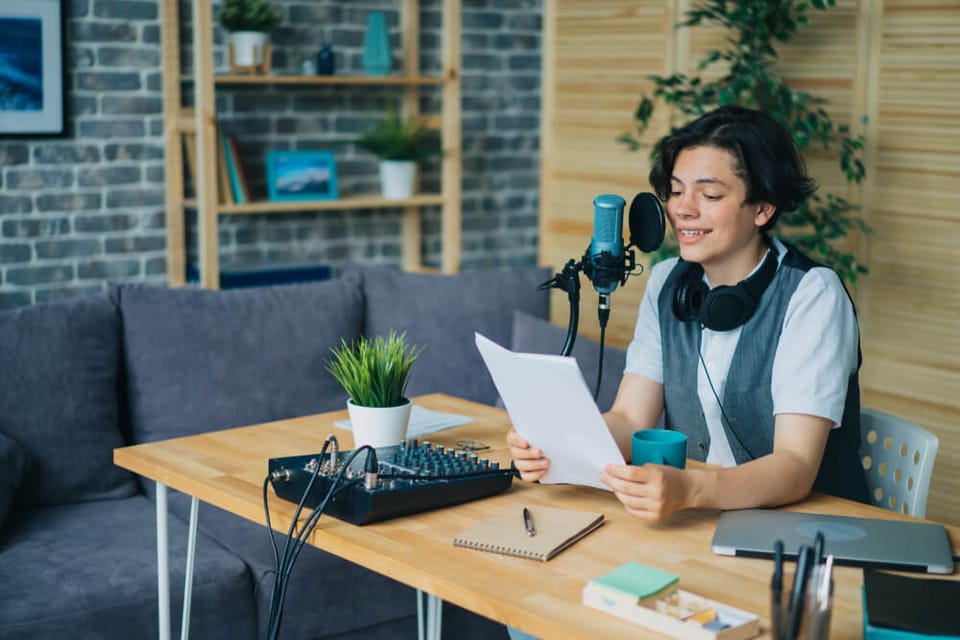
- Record in the softest room. A bedroom with a bed, curtains, and carpet beats a kitchen with tile and glass. Closets full of clothes are legendary for a reason.
- Pin a duvet behind the mic. The wall behind and beside the microphone contributes most of the reverb. A duvet, moving blanket, or even a folded comforter on a chair kills it for free.
- Get close and slightly off-axis. A hand's width from the mic, mouth angled just past the capsule: maximum voice, minimum plosives and room.
- Kill the hum at the source. Air conditioning and fans off during takes. In hot climates, record in the cool of the evening or pre-cool the room, then cut the A/C for the take.
- Carpet over tile. Hard floors reflect; a rug between you and the desk is a $30 fix that compounds with everything else.
Spend zero dollars here before spending hundreds on gear — treatment upgrades every microphone you will ever own. The $100 tier adds foam panels at first-reflection points, which is the only paid treatment most home studios need.
The AI cleanup tools compared
Riverside and Descript publish capable production guides, but each reviews its own stack. Here is the independent comparison, including what each tool is actually for:
| Tool | Where it shines | Filler words | Noise and echo | Language support | Pricing model |
|---|---|---|---|---|---|
| Adobe Podcast Enhance Speech | One-click voice enhancement | No — enhancement only | Yes, both, in one pass | Strongest on English | Free tier |
| Cleanvoice | Automated filler, stutter, and mouth-sound removal | Yes, the core feature | Yes, basic cleanup | Many languages, Arabic included | Paid credits |
| Auphonic | Leveling and loudness normalization to target | No | Yes, steady noise and hum | Language-agnostic processing | Free monthly allowance plus paid hours |
| Resound | Fast noise and echo cleanup | No | Yes, both | Language-agnostic processing | Free tier plus paid plans |
| Descript Studio Sound | Enhancement inside a text-based editor | Yes, via transcript deletion | Yes, both | Depends on transcript language support | Subscription feature |
| Riverside Magic Audio | Cleanup built into remote recording | No | Yes, echo and noise | Language-agnostic processing | Included in recording plans |
How to stack them: enhancement or de-noise first, structural edit second, mastering last. Two warnings from hard experience. Always archive the raw recording — some enhancement is irreversible, and you want the option to reprocess.
And never stack two enhancers on the same voice; artifacts compound, and the result sounds like a robot doing an impression of you. If you record in more than one language, verify how each tool handles it before a client episode depends on it — filler-word detection in particular is language-specific.
AI voices and music for intros, used honestly
Two more production jobs now sit inside the AI layer: intro narration and music. AI text-to-speech voices — ElevenLabs is the best-known — can read a 30-second intro cleanly, which suits hosts who hate re-recording their own tagline every episode, and opens a second-language intro for shows reaching international audiences. Use it for tags and transitions, not full episodes; audiences forgive an AI intro, not an AI host.
Music licensing is the trap. Generate a track with an AI music tool and you still need to read its commercial terms — many free tiers forbid monetized use or add watermarks. The safe pattern: license from a stock library or use an AI generator whose paid tier grants commercial rights in writing.
The intro script itself is a template — hook, show name and promise, episode tease, guest credential, transition — 30 to 45 seconds at a natural pace. It sits in the template pack below.
The workflow: from raw recording to published episode
Here is the entire podcast audio production pipeline on a budget — seven steps, one evening per episode:
- Record with production in mind. Close mic, headphones on, phone in airplane mode. Capture 10 seconds of room tone before the first take — de-noise tools use it as a noise profile — and test levels on a 30-second sample, because gain cannot be fixed afterward. Record a backup track, and shoot video at your device's best quality, since 80.5 percent of podcasters now record video — our AI video script guide covers that side.
- First-pass clean. Run the raw file through speech enhancement — one tool, one pass. Listen to the before and after on earbuds, not just studio monitors. If the voice acquires a shimmer, dial intensity down or revert; subtle beats aggressive every time. When the tool allows it, process each speaker's track separately — a quiet guest and a loud host need different treatment.
- Structural edit in the transcript. Open the episode in a text-based editor, then fix pacing by deleting sentences: the false start, the repeated explanation, the ninety-second tangent. This is where a podcast episode gets good — content editing, not waveform surgery.
- Remove fillers and artifacts. Run filler-word removal against a custom list, then review every flagged cut. Some fillers are human glue; delete all of them and conversations sound edited. Trim mouth sounds and long gaps in the same pass.
- Assemble and master. Lay in the intro, outro, music beds, and sponsor read at the script's marks. Then master: loudness normalized to your target, peaks controlled, levels matched between hosts. Check the sponsor read against the conversation — a read that jumps noticeably louder than the host sounds like an interruption, not an ad. Let the tool do 90 percent, then listen to the seams.
- Export to spec. MP3, constant bitrate, 44.1 kHz, loudness and peaks per the delivery table below. Name the file with show, episode number, and title so your hosting platform never misfiles it, and keep a lossless archive copy so future remastering never starts from a lossy file.
- Publish and verify. Upload to your host, check the episode on Apple Podcasts, Spotify, and Anghami — art, title, and chapters rendering correctly in each app — then publish the transcript and show notes on your site. The script you produced the episode from — per our podcast scripting guide — already contains half the show-notes copy.
Delivery specs: the numbers platforms expect
These are commonly cited delivery standards, not enforced law — no platform rejects your episode at -15 LUFS — but hitting them keeps your show at comfortable volume next to every other episode in a listener's queue:
| Spec | Target | Why it matters |
|---|---|---|
| Loudness | -16 LUFS stereo / -19 LUFS mono | The normalization level most platforms aim toward |
| True peak | At or below -1 dB | Prevents distortion when MP3 encoding adds level |
| High-pass filter | Around 80–100 Hz | Removes rumble without thinning the voice |
| Compression | Around 2:1, gentle | Evens out soft and loud moments |
| RMS reference | -16 to -12 dB | An older meter some engineers still cross-check |
| Format | MP3, 96–128 kbps CBR, 44.1 kHz | Standard hosting delivery for spoken audio |
| ID3 tags | Show name, episode number, title, artwork | How players display your episode correctly |
Mono speech files at 96 kbps sound transparent and download fast on mobile data; use 128 kbps once music carries real weight in the episode. Constant bitrate beats variable — some players misreport duration on VBR files.
Copy-and-use templates for the editing desk
The intro script template — 30 to 45 seconds at a natural pace:
HOOK LINE: the episode promise in one sentence.
SHOW NAME + PROMISE: "You're listening to {show}, where {promise} every {cadence}."
EPISODE TEASE: what this specific episode delivers.
GUEST CREDENTIAL: one sentence, achievements in listener terms — if any.
TRANSITION: "Let's get into it."
The AI cleanup prompt — run against your transcript before the structural edit:
Here is my episode transcript. Flag: (1) sentences to cut for pacing, (2) every
filler word with its location, (3) the 3 strongest candidate cold opens, and
(4) a 60-second mid-roll sponsor read in a conversational tone for {product}.
The show-notes prompt — run against the final transcript after editing:
From the transcript below, create: a 120-word episode description containing
"{keyword}", 5 timestamped chapter titles, 3 shareable quotes, and a 150-word
newsletter section summarizing the episode.
Transcript: {paste transcript}
The publishing checklist — every episode, every time:
1. Loudness check: -16 LUFS stereo or -19 LUFS mono
2. Peaks at or below -1 dB
3. Export MP3, 96-128 kbps CBR, 44.1 kHz
4. ID3 tags: show name, episode number, title, artwork
5. Upload to host and verify the RSS item
6. Check the episode on Apple Podcasts, Spotify, and Anghami
7. Publish transcript and show notes on your site
8. Queue the newsletter section and social clips
The last two prompts are where a writing platform earns its keep: the transcript becomes description, chapters, quotes, and a newsletter in one pass. ArWriter (https://app.arwriterai.com/) does exactly this with GPT-4o and Gemini in a single editor — 40+ tools, saved prompts, bilingual output — from $4.99 a month.
The transcript can come from any speech-to-text pipeline; ours is documented in the Gemini transcription guide, and our repurposing guide turns the same material into blog and social copy. If the newsletter step becomes a habit, the weekly AI newsletter system shows the full setup.
How a Rotterdam agency cut editing from nine hours to two
Emma Janssen's agency in Rotterdam spent 2025 producing two client podcasts the traditional way: record, ship raw audio to a freelance editor, wait five days, request changes, wait again. The retainer cost about $1,600 a month, and the agency refused new podcast clients because editing capacity — not sales — was the constraint.
In early 2026 Emma rebuilt the pipeline around AI production. Each episode now moves through a fixed chain: speech enhancement first, then a transcript-based edit where clients approve cuts by deleting sentences in a document, then automated mastering to -16 LUFS with peaks at -1 dB.
Editors still touch every episode, but they polish instead of grind. Editing time fell from about nine hours per episode to two, and the freelance retainer was replaced by a tool stack costing roughly $60 a month.
One client nearly walked in month two. An early episode had been run through enhancement at full strength, and the host's voice came back with a faint robotic shimmer that nobody noticed on studio monitors — but everyone heard on earbuds. Emma's team restored from the raw backup, reprocessed at reduced intensity, and wrote a house rule: every enhancement is A/B checked on three devices before delivery, and raw files are archived forever.
By September 2026 the agency produces six client shows with the same team that once struggled with two. Annual contracts renew because episodes sound consistent — week after week, client after client — at a fraction of the old cost.
Production mistakes that waste good recordings
- Mastering before editing. Order matters: clean, edit, assemble, then master. Mastering first bakes in noise you will edit around.
- Enhancing at full strength. More processing is not more professional. Subtle enhancement preserves the voice; maximum settings produce artifacts on earbuds that studio monitors hide.
- Deleting the raw file. Storage is cheap; reprocessing is impossible without the original. Archive every raw take.
- Skipping the ID3 tags. The best episode in the world displays as an untitled file when tags are missing. Thirty seconds at export fixes it forever.
- Recording without headphones. You cannot fix what you never heard. Monitor while recording, even on cheap earbuds.
- Trusting one device. Check the final file on earbuds, a car speaker, and a laptop. Episodes live in the real world, not in your studio.
Frequently asked questions
What is the best free AI audio enhancer for podcasts?
Adobe Podcast Enhance Speech is the safest free first stop for one-click noise and echo cleanup, with processing limits on longer files. Auphonic and Resound also include free monthly processing. Test any tool on the same 60-second clip before committing your whole episode.
How do I remove filler words from my podcast audio?
Transcribe the episode, then delete the words from the transcript in a text-based editor — the audio cuts itself. Cleanvoice automates the same job by detecting fillers and mouth sounds across many languages. Review flagged words before deleting; some fillers are natural speech glue.
How much does podcast editing cost?
Riverside's 2026 guide puts freelance editing at $30 to $50 per finished audio hour, rising to $200 for specialists. A 40-minute episode therefore runs roughly $20 to $35 outsourced — or a few dollars of tool time with an AI pipeline doing the heavy lifting.
What LUFS should a podcast be?
The commonly cited delivery standard is -16 LUFS for stereo and -19 LUFS for mono, the level most platforms normalize toward. Directories will not reject louder or quieter files, but hitting the standard keeps your episode at a comfortable volume beside every other show.
What MP3 bitrate should I export my podcast at?
96 to 128 kbps constant bitrate at 44.1 kHz is the standard delivery range for spoken audio. Speech stays transparent at 96 kbps; step up to 128 when music matters. Avoid variable bitrate — some podcast players misreport episode duration on VBR files.
Can AI remove background noise from a recording?
Yes, within limits. Adobe Podcast Enhance, Resound, and Auphonic reduce steady noise like fans and air conditioning convincingly. Sudden, loud, or overlapping sounds are harder, and stacked enhancers create artifacts — so prevention at recording time still beats cleanup.
Do I need acoustic treatment to record at home?
You need absorption, not a studio. A closet of clothes, a duvet pinned behind the mic, and carpet underfoot kill most room echo for free. If a handclap in the room rings back at you, treat the space before blaming the microphone.
What is the difference between mixing and mastering a podcast?
Mixing balances elements inside an episode: voices, music beds, and levels between hosts. Mastering polishes the final file: overall loudness to a LUFS target, peak control, and consistent tone across episodes. Modern AI tools increasingly handle both in one pass.
Sources
- How to Edit a Podcast — Riverside — editing workflow benchmarks and freelance editor pricing, updated July 2026
- Podcast Starter Kits for Any Budget — Descript — gear tiers from $0 to $2,500, updated July 2026
- Adobe Podcast Enhance Speech — Adobe — the official free speech enhancement tool
- The Infinite Dial 2026 — Edison Research at SSRS — online audio listening levels in the US
Our verdict
Podcast audio production has quietly become a software problem, and software problems are the good kind. The room still matters, the microphone distance still matters, and taste still matters most — but reverb, noise, fillers, and loudness are now solved in an evening by AI podcast editing tools that cost less than one outsourced editing hour.
The stack that works: a $100-to-$150 kit or your phone, free room treatment, one cleanup tool from the comparison table, a text-based editor, and automated mastering to -16 LUFS with peaks at -1 dB. Add the publishing checklist and every episode ships consistent — which is the real definition of studio sound.
For everything the audio tools do not do — descriptions, chapters, show notes, newsletters, and the bilingual copy international shows increasingly need — ArWriter (https://app.arwriterai.com/) covers the writing side with GPT-4o, Gemini, and 40+ tools from $4.99 a month. Record this week; clean it the same night; publish like a studio.